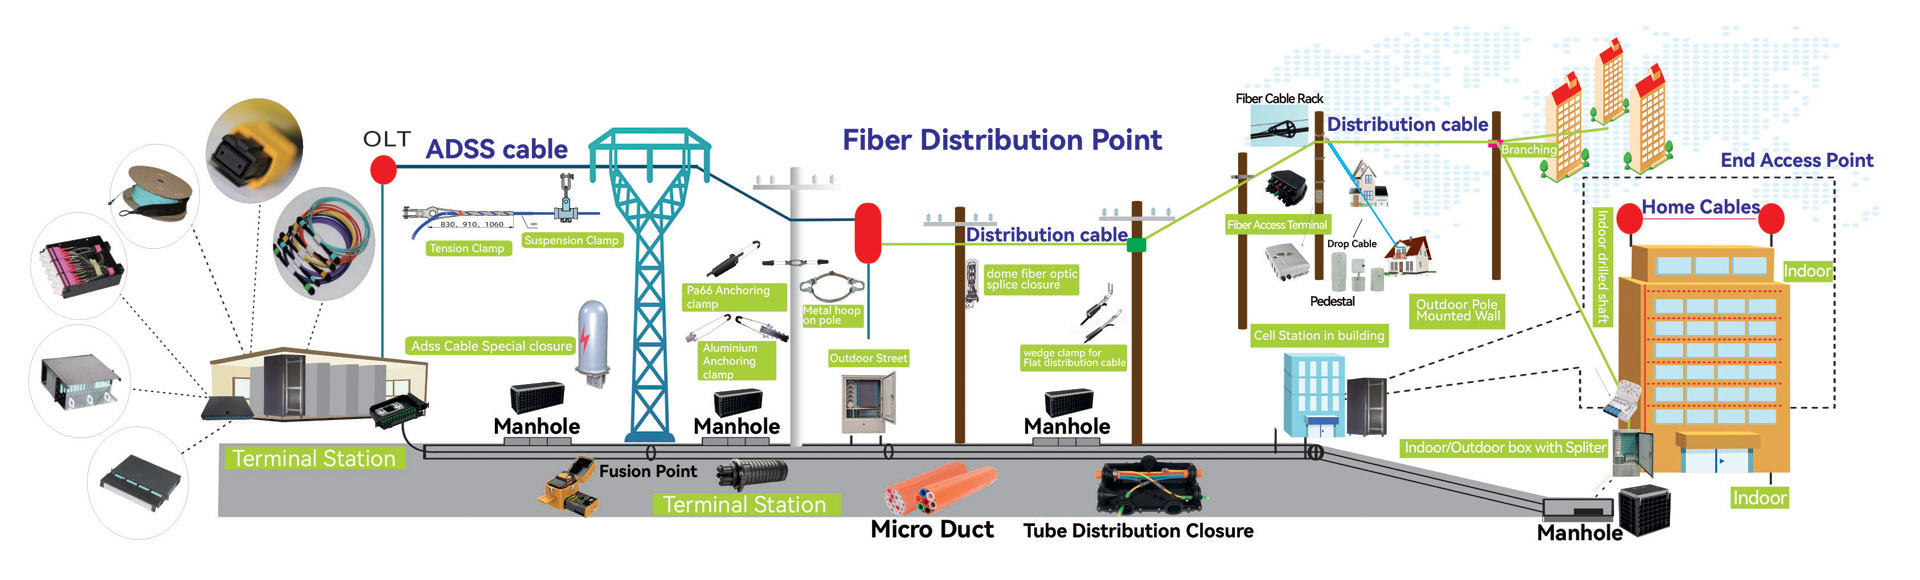
To be cost-effective aerial deployments require access to existing poles, which may be restricted or need to be strengthened. Self-supporting aerial cables are reinforced with internal strength members to support their own weight.
2.ADSS Installation Methods
1. Installation Process (Conventional Method)
1 To start with, a UV resistant cable jacket is required for all aerial applications.
2 Orientate the drum so that the natural payoff direction faces the pulling direction.
3 To eliminate possible cable contact with the ground, play the cable off from the top of the drum.
4 Fit cable pulley boxes / wheels to every pole on the route, for the length of cable to be erected.

5 Feed the pulling rope through the pulleys. It is extremely important that the pulling rope and the ADSS cable have the same diameter.
6 Make a hauling eye at the end of the cable by removing a piece of the cable sheath (250-300mm).Next, the Kevlar of the cable is then wound around the cable and attached to the cable using a 25/8 heat shrink sleeve.
7 Place the drum at least 50m away from the pole where the cable is to go through the first pulley.This will prevent the cable from bending too much while being pulled.
8 Attach a break-away swivel to the end of the hauling rope and then attach the other end of the break-away swivel to the hauling eye of the cable - erecting can now begin.
9 Cable lengths of up to 6000m can be erected with one haul, if the terrain allows for it.
10 Radio Communication between persons at the drum, alongside the cable-end and the hauling team must be maintained.
11 When hauling the cable, a person with a two-way radio must walk alongside the cable-end to ensure that the cable is not twisting with the rope, especially at angle-poles.
12 The hauling team must haul the cable evenly and prevent jerking. The person(s) at the cable drum must "feed" the cable off the drum at the same speed at which the cable is being hauled. There must be no strain on the cable between the drum and the first pulley.
13 A good rule of thumb is to keep the pulling tension to ½ that of the sagging tension (see sagging).
14 When removing a pulling grip, 3-5 meters of adjacent cable must be cut-off and discarded.
2. Installation Process (Figure 8 method)
1 This method should be used only when the terrain is such that the conventional method cannot be used. Place the drum approximately halfway along a long hauling section.
2 Follow steps (1) to (8) as described above (Conventional Method).
3 The one half of the cable length is hauled in the one direction.
4 The balance of the cable is then completely run off the drum into a figure 8 on a tarpaulin, after which it is hauled in the opposite direction.
5 The figure 8 method should not be used for cables longer than 4000m as it becomes risky to manage a coil longer than 2000m, without potentially damaging the cable.
04-08
202404-07
202403-26
202403-26
202403-18
202403-18
202403-13
202403-11
202403-11
202403-07
2024