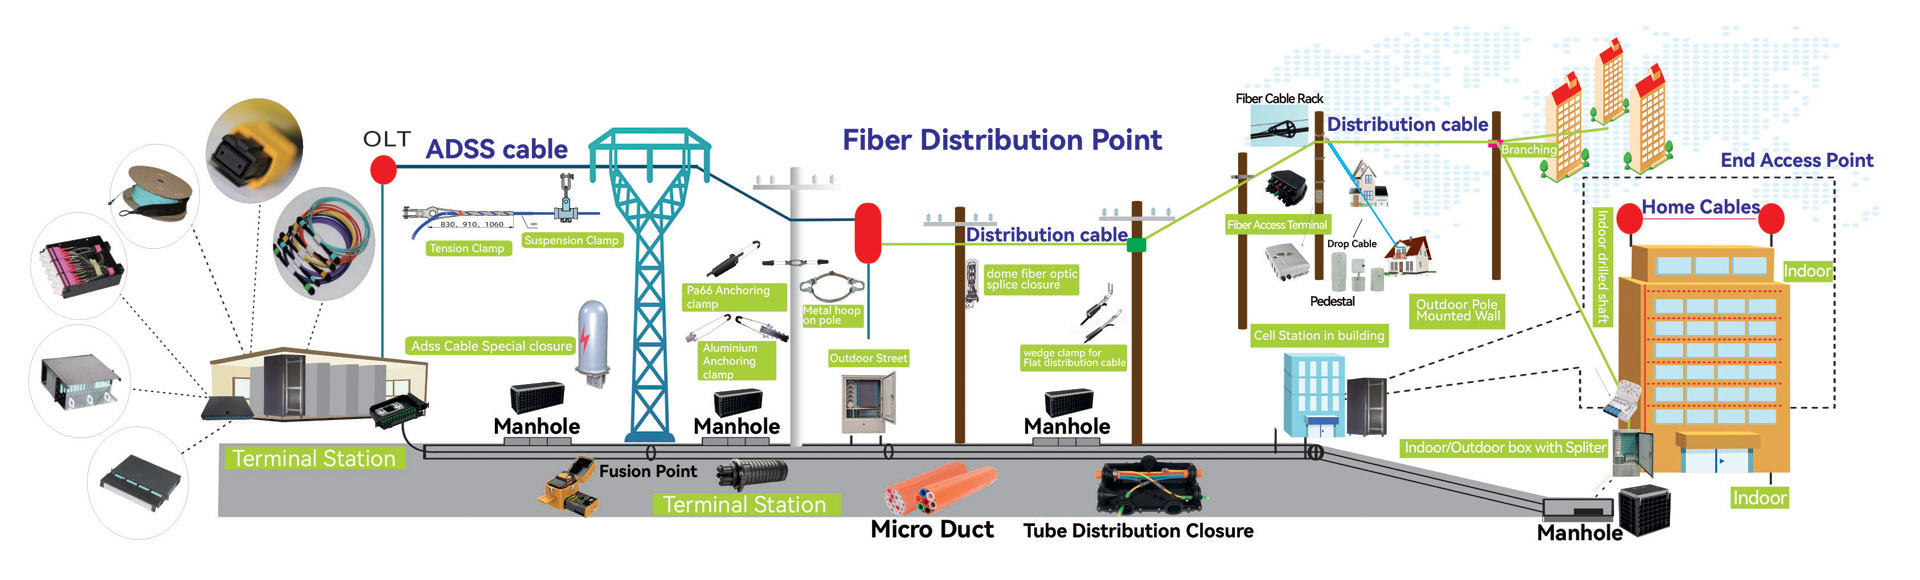
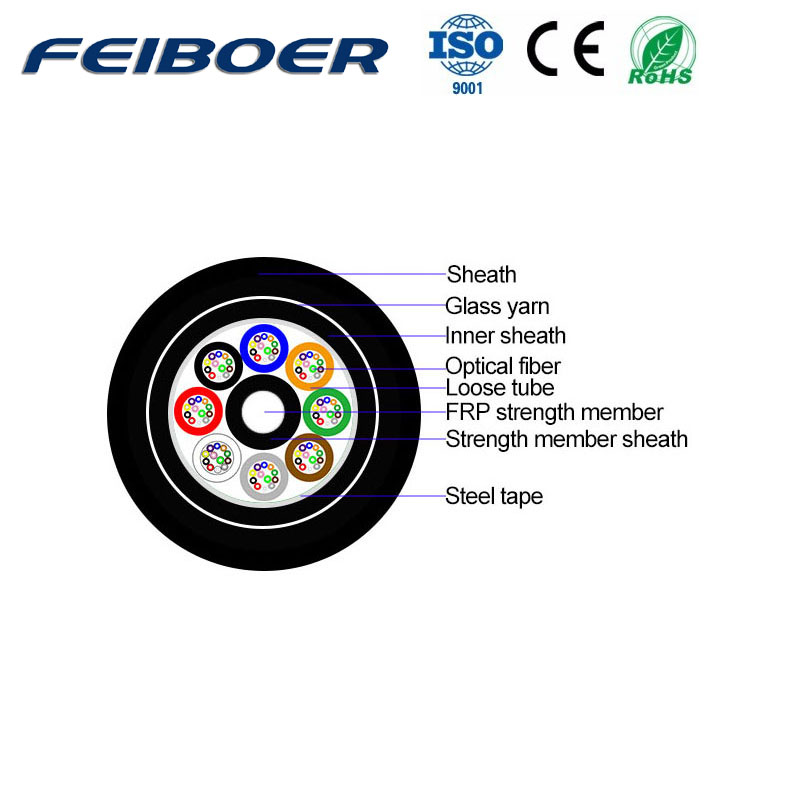
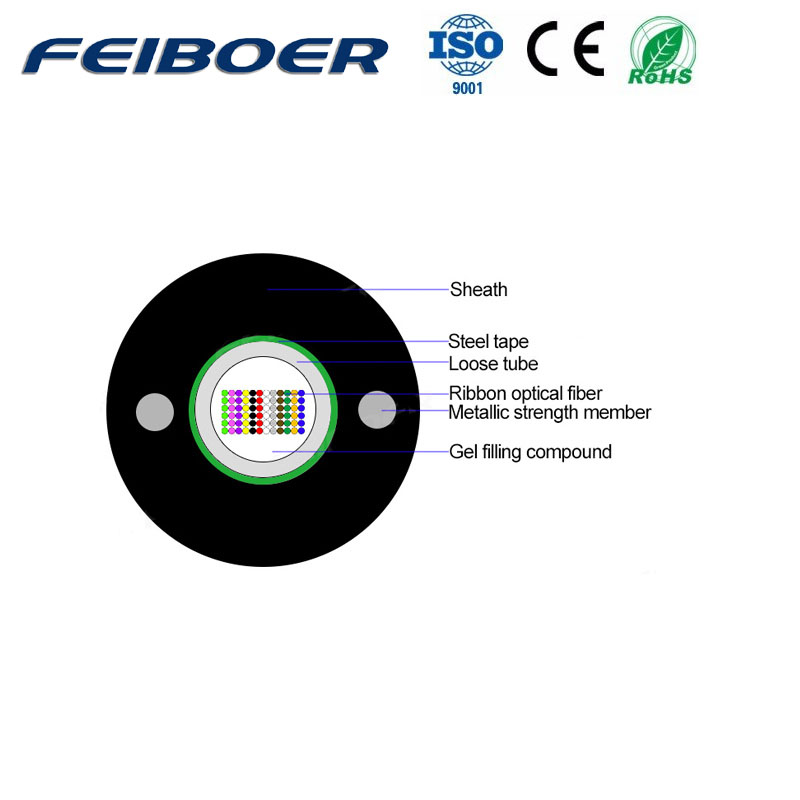
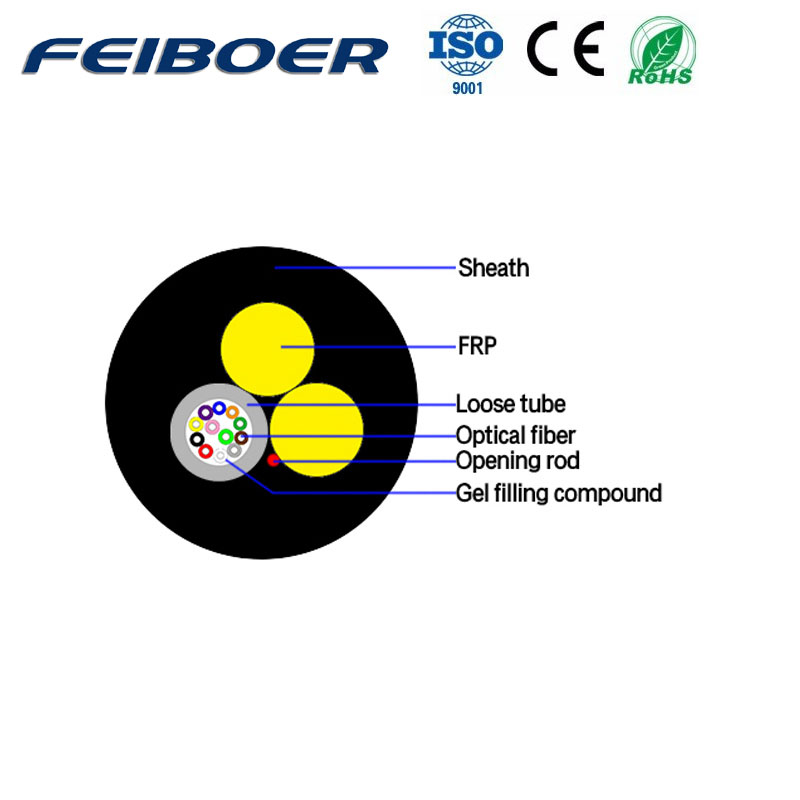
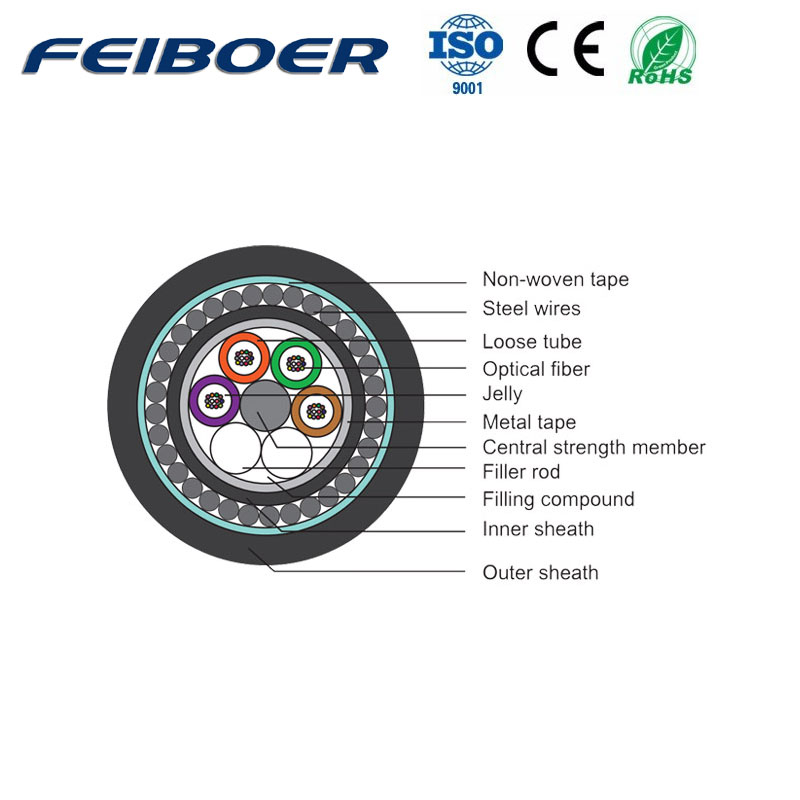
The sequence of fiber optic cable fusion:
1. Strip the optical cable and fix the optical cable into the splice box. When fixing multi-bundle tube-layer optical cables, each bundle of tubes should be placed in order to avoid twisting. Insert the optical cable into the splice box, and the steel wire must be pressed tightly without loosening. Otherwise, it may cause the fiber core to roll over the fiber optic cable. Be careful not to hurt the tube bundle, take about 1 meter in length, and wipe the ointment with toilet paper.
2. Pass the fiber through the heat shrink tube. Separate the fibers of different tube bundles and colors and pass them through the heat-shrinkable tube. The fiber optic cable that has been stripped of the coating is fragile. Use heat shrink tubing to protect the fiber optic connector. 3. Turn on the power of the fusion splicer and select the appropriate fusion splicing method. The power supply of the fusion splicer has two types: DC and AC, which should be switched reasonably according to the type of power supply current. Before each use of the fusion splicer, allow the fusion splicer to stand in the fusion environment for at least 15 minutes. Set the splice parameters, pre-discharge time, time and main discharge time, main discharge time, etc. according to the fiber type. Dust and fiber debris in the fusion splicer should be removed in time during and after use.
4. Fabricate the fiber end face. The quality of the fiber end face will directly affect the quality of the connection, so it is necessary to make a qualified end face before fusion splicing.
5. Cutting of bare fibers. First clean the cutter and adjust the position of the cutter. The placement of the cutter should be stable. When cutting, the action should be natural and stable, not heavy or light. Avoid bad end faces such as broken fibers, bevels, burrs and cracks.
6. Place the optical fiber. Put the optical fiber in the V-shaped groove of the fusion splicer, carefully press the optical fiber pressure plate and the optical fiber clamp, set the position of the optical fiber in the pressure plate according to the fiber cutting length, close the windshield, and press the fusion key to automatically complete For splicing, the estimated loss value will be displayed on the splicer display.
7. Remove the optical fiber and heat it with a fusion splicer heating furnace. Even if the splicing is completed, if necessary, you can also test whether the optical cable line is faulty.
04-08
202404-07
202403-26
202403-26
202403-18
202403-18
202403-13
202403-11
202403-11
202403-07
2024