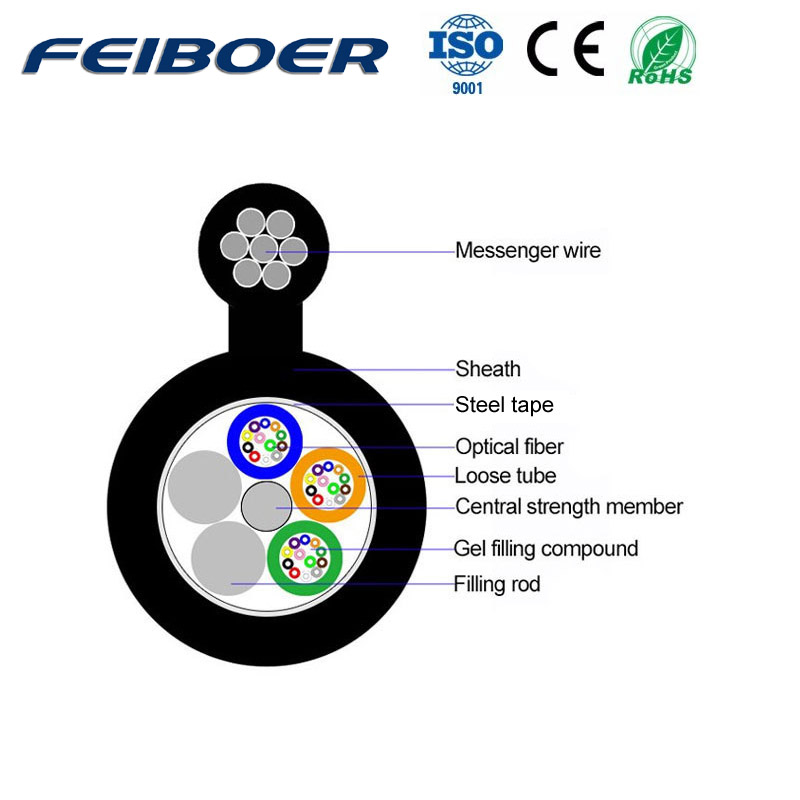
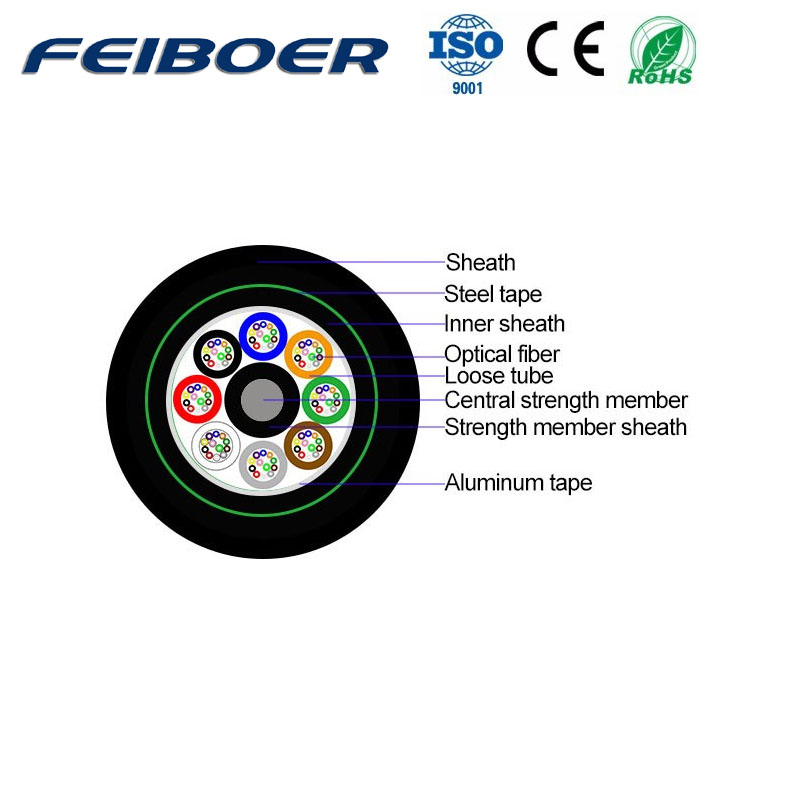
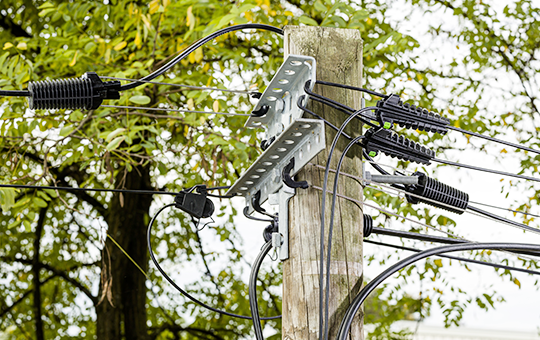
Figure-8 fiber optic cable installation refers to a specific method of aerial installation for fiber optic cables. In this installation technique, the fiber optic cable is designed in the shape of a figure-8, resembling the number 8 when viewed from the side. This design allows the cable to be easily suspended between two supporting structures, such as poles or towers, without the need for additional support hardware.
Here's an overview of the steps involved in figure-8 fiber optic cable installation:
Survey and Planning: Conduct a thorough survey of the installation route to identify suitable supporting structures (poles, towers, etc.) and determine the required length of cable.
Preparation: Prepare the supporting structures by installing brackets or clamps to securely anchor the cable.
Cable Preparation: Uncoil the figure-8 fiber optic cable and inspect it for any damage or defects. Ensure that the cable is free from twists or kinks.
Installation: Begin by attaching one end of the figure-8 cable to the first supporting structure using appropriate hardware (such as suspension clamps or brackets). Carefully guide the cable across the installation route, maintaining proper tension and avoiding excessive bending or twisting.
Sag Calculation: Calculate the appropriate sag (vertical distance between the lowest point of the cable and the ground) based on factors such as span length, cable weight, wind conditions, and temperature variations. Proper sag calculation helps prevent excessive stress on the cable and ensures reliable performance.

Suspension: As the cable is guided across the span, suspend it between the supporting structures using suitable hardware at regular intervals. Maintain proper sag and tension to prevent damage to the cable and ensure stability in varying weather conditions.
Termination: Once the cable is fully installed, terminate it at the endpoints using splice closures or termination boxes. Ensure proper cable management and sealing to protect the optical fibers from environmental factors.
Testing: Conduct thorough testing of the installed fiber optic cable to verify signal integrity, attenuation levels, and overall performance. Use optical time-domain reflectometry (OTDR) and other testing equipment to identify any faults or anomalies and address them promptly.
Documentation: Document the installation process, including cable routes, hardware specifications, termination points, and testing results. This documentation serves as a valuable reference for future maintenance and troubleshooting.
Figure-8 fiber optic cable installation is commonly used in aerial applications due to its simplicity, cost-effectiveness, and suitability for long-span deployments. Proper planning, careful execution, and adherence to industry standards are essential for ensuring a successful and reliable installation.
04-24
202404-23
202404-23
202404-08
202404-07
202403-26
202403-26
202403-18
202403-18
202403-13
2024